
Benefits of Choosing Wood Fencing
Natural Aesthetic Appeal
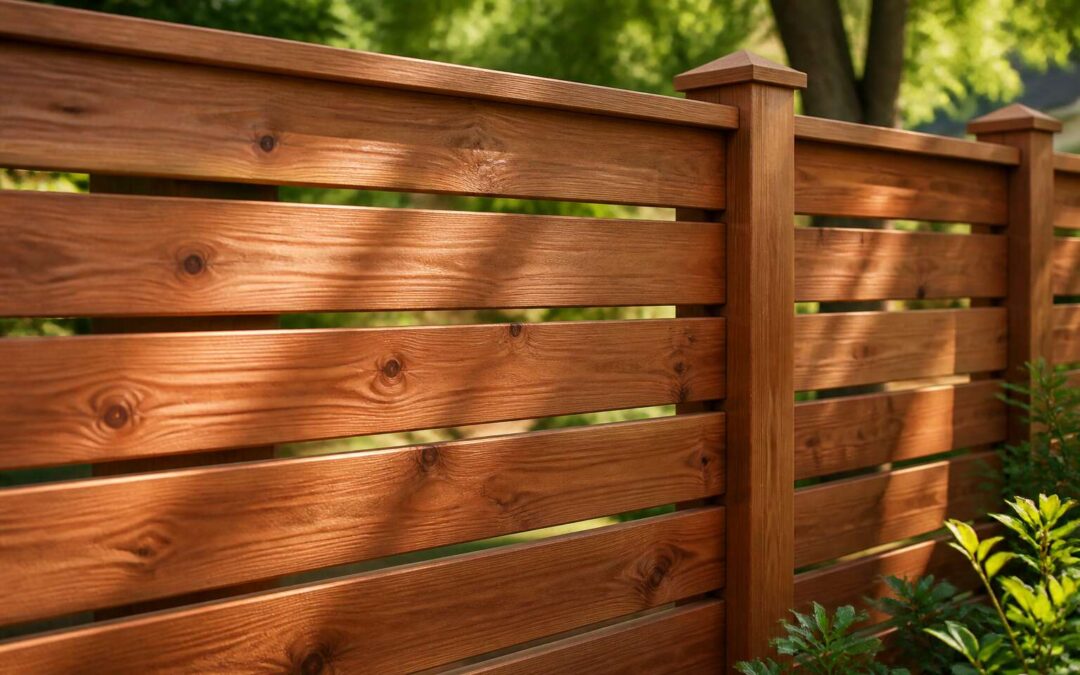
Walking past a row of houses in Pretoria, I notice how a timber boundary softens the entire street. The natural grain and warm hues of wood create a visual rhythm that concrete or steel cannot replicate. For South African homes, fencing with wood offers an earthy character that changes with the light!
Unlike synthetic materials, wood develops a rich patina over time. It responds to sun and rain, reflecting the landscape’s character. This organic quality appeals to homeowners seeking a connection to nature.
- Each plank carries unique grain patterns.
- Colours range from pale honey to deep mahogany.
- Textural variety adds depth to any garden.
In my view, this aesthetic versatility makes it a compelling choice for properties from Cape Town to Durban.
Cost-Effectiveness Over Time
Consumer price data from the South African Property Owners Association shows that a standard 30-metre boundary in face brick will set you back anywhere from R60,000 to R90,000. A comparable fence using treated pine or gum poles lands closer to R35,000. That arithmetic alone makes fencing with wood attractive to anyone watching their bond repayments.
The long-term picture works in your favour. Timber sections can be replaced individually. One rotten board costs R150 and twenty minutes of work. A cracked brick wall, by contrast, often requires a contractor, a mixer, and a weekend you will never get back. Over fifteen years, the cost of maintaining fencing with wood remains modest and predictable.
- Replacement is piecemeal, so you never face a full rebuild.
- Treatment products extend lifespan to 20 years or more.
- Resale value improves, as buyers recognise timber as a finished, deliberate feature.
Now the honest caveat. Wood asks for attention. A coat of preservative every few years is not optional. But compare that to steel, which rusts from one scratch, or precast concrete, which cracks and stains. The maintenance ritual of timber is cheaper than the emergency repairs of its rivals.
I have seen homeowners in Johannesburg’s northern suburbs tear out failing palisade fencing and replace it with timber. The decision almost always comes down to the same realisation: fencing with wood costs less to own over the full lifespan.
Customization Options
Your erf is not a rectangle in a catalogue. Fencing with wood acknowledges that reality, allowing you to dictate the design down to the last screw. A sloping boundary? Panels can be stepped or raked to follow the terrain. Security concerns? Specify closer post spacing or adjust the palisade height. The spectrum of finishes, stains, and rail layouts means the final product answers to you, not to a factory’s standard offerings.
- Vertical palisade for security with visible sightlines
- Horizontal slatting for privacy with clean geometry
- Cattle rail for rural perimeters
- Lattice crowns for partial screening
In my experience, every configuration shifts the function and character of the boundary. That is why fencing with wood remains the default for owners who treat their perimeter as infrastructure, not afterthought.
Privacy and Security
In South Africa, the suburban street offers no natural privacy, a fact I have seen on countless erf corners. Every gate, path, and movement sits in plain view. Fencing with wood restores control over that exposure. A solid timber screen blocks sightlines and dampens noise. Your life remains your own behind it.
Security follows from the material itself. Wood does not rattle in the wind. It absorbs impact and offers no easy foothold. The thickness of the timber creates a real barrier. This fence stops both sight and body. It gives you time to react to whatever approaches!
Privacy and security both depend on this boundary. Wood hides the washing line and the pool deck. The braai area stays out of view. This is why fencing with wood remains a practical answer for South African homeowners who want a private outdoor space.
Environmental Sustainability
A timber fence begins sequestering carbon the day the tree is planted. That early advantage never leaves the material. In South Africa, certified plantations supply fencing with wood, and every harvest rolls into a replanting cycle. Steel and PVC, by contrast, consume vast energy in production and leave a permanent industrial footprint.
Wood keeps working after installation! Each panel holds carbon dioxide locked within its fibres for decades, storing it away from the atmosphere. When the fence reaches the end of its life, the timber breaks down into soil and leaves no hazardous waste behind.
The sustainability of fencing with wood carries through the supply chain. Local sawmills shorten transport distances, and offcuts become mulch or biomass. The full cycle ends where it began, in the earth.
Selecting the Right Wood Species
Cedar and Its Natural Resistance
Untreated cedar can endure decades of outdoor exposure. The wood contains thujaplicin, a natural fungicide that repels rot and insects. This matters when you choose fencing with wood, because maintenance costs often exceed the initial price!
- Heartwood holds high concentrations of natural oils
- Resists moisture absorption better than pine
- Deters subterranean termites found across South Africa
From my experience, many homeowners overlook species selection. They pick any timber, then face warping. Cedar, particularly Western Red Cedar, provides dimensional stability. Its low density also reduces strain on posts and rails. That resistance eliminates the need for chemical treatments, a relief for anyone who wants a low-maintenance option. Cedar still needs proper installation and airflow to reach its full lifespan.
Pressure-Treated Pine for Durability
From my experience, pressure treated pine offers a different kind of resilience. The timber is infused with preservatives under pressure, forcing chemicals deep into the cell structure. This process creates a barrier against moisture, fungal decay, and termite activity. In South Africa, where rainfall and termite pressure differ sharply by province, this treatment gives fencing with wood a predictable service life.
The trade off is maintenance. Pine is softer than hardwood. It can crack or warp if installed before full seasoning, and poor airflow can speed surface checking. Still, the treatment targets the most vulnerable zone, the ground line, where posts usually rot first.
Pressure treated pine also suits large installations because it costs less per metre than cedar or hardwood. That affordability allows homeowners to extend boundary lines without compromising durability.
Redwood for Premium Look
Redwood remains the discerning choice for fencing with wood. Its heartwood carries a deep russet tone that enriches with age, and the grain runs long and true. In South Africa, where coastal sun can bleach lesser timbers, redwood’s natural tannins produce a slow, dignified patina rather than a grey, brittle fade.
Dimensional stability sets redwood apart. It resists warping and shrinking better than most domestic hardwoods, making it ideal for long, uninterrupted fence runs where panel alignment matters.
Consider these attributes:
- Natural resistance to insect attack
- Exceptional workability for detailed profiling
- Low density reduces load on posts and rails
For a boundary that makes a quiet statement, redwood delivers an unmatched presence.
Tropical Hardwoods Comparison
When selecting the right wood species, tropical hardwoods offer a different equation. Unlike softwoods, these timbers trade ease of handling for sheer longevity. In South Africa, Balau and Merbau stand out for fencing with wood because they tolerate humid coastal air and heavy rain without succumbing to rot.
Comparing them requires looking at density and silica content. I have found Balau to be dense and pale, while Merbau has a darker tone and higher oil content. Both resist termites well, but the workability varies considerably.
- Balau: very hard, blunts blades quickly
- Merbau: stable, exudes natural oils
These differences matter when you plan for long term maintenance. Your budget and tooling will steer the decision.
Budget-Friendly Alternatives
Only 40% of homeowners compare wood species before they build a fence. Budget-friendly options do not require settling for shoddy timber. Saligna (eucalyptus) is cost effective and termite resistant when treated. Bamboo suits dry regions, though it fades. Scaffold planks, salvaged from building sites, give a rugged look without the premium price.
- Saligna splits if nailed too close to an edge
- Bamboo is lightweight but fades in direct sun
- Scaffold planks carry nail holes and old paint
The real cost in fencing with wood, I have found, is often the labour. A cheap plank that rots in three years fails your wallet.
Essential Tools and Materials
Measuring and Marking Tools
Every fence begins as a small chalk mark on the ground, and that mark will either save you hours or cost you days! In my years working with fencing with wood, I have seen straight posts fail because the measuring was rushed. A good steel tape measure, preferably eight metres long, is the first tool to open.
The South African sun can fade pencil lines quickly, so a chalk line snaps a straight reference across uneven soil. A combination square verifies the right angles at posts and rails. For fine markings on timber, use a marking knife to trace a hairline that remains visible through the afternoon heat.
- Steel tape measure
- Chalk line
- Combination square
- Marking knife
Digging Equipment
Once the chalk lines are snapped, the ground decides how honest your measuring really was. In South Africa, that ground is often compacted clay or shale, and it will blunt a cheap spade before lunch. Digging equipment is where many fencing with wood projects separate from the professionals.
The standard set is simple but specific:
- A post hole digger with hinged blades for clearing loose soil
- A digging bar to break through rock and roots
- A sharp round-point spade for cutting clean edges
I always carry a crowbar too. The moment steel hits a buried dolerite boulder, you will be glad for the leverage. Trying to widen a hole with a trowel is a mistake I see every summer. Proper equipment turns a full day of digging into two hours of honest work, and that time matters as much as the fencing with wood that stands above it.
Concrete and Fasteners
Most fence failures in fencing with wood happen below the ground line, not in the frame. Concrete is the only material that settles a post while the wind tests the panel above. In South Africa, use a stiff mix, about one part cement to five parts aggregate. Wet concrete will shrink and channel rainwater straight to the post base.
Fasteners determine how long the joints hold before they work loose. For fencing with wood, choose materials that match the local climate:
- Hot-dipped galvanised nails for standard timber frames
- Zinc phosphate coated screws for high wind areas
- Stainless steel screws for coastal properties
Bare steel rusts quickly in coastal air, and a joint that fails at night lays the truth bare: the whole fence was never stronger than its small parts.
Post and Rail Options
A post carries the weight of the entire fence. The rail carries the wind. In South Africa, choosing the post starts with the local termite pressure. Common options:
- Tamboti hardwood for termite resistance
- Rooikrans for affordable durability
- Pressure treated pine for budget builds
- Steel posts for mixed material systems
The rail determines the span. Standard 38x73mm pine rails work for most residential runs. For longer stretches, double the rails or step up to a heavier section.
Fencing with wood hides its faults in the horizontal line. A string line stretched between corner posts shows deviations the eye misses. A spirit level on two faces catches lean before the concrete locks.
Post spacing changes everything. At 2.5 metre centres, 38x38mm rails hold their line. Stretch to 3 metres and you need 38x73mm. The price difference is small. The sag difference is permanent.
Safety Gear
Safety gear is the unglamorous half of fencing with wood. I have watched backyard builds stall because someone skipped the basics. Leather gloves stop splinters that take days to surface. Safety glasses keep sawdust out of your eyes. Steel-cap boots matter when a post shifts. Ear defenders are essential after an hour of cutting.
The rest of the kit is small:
– A post level that clips onto the rail
– A sharp handsaw for tidy cuts
– Galvanised brackets for joints
– A first aid kit within reach
Loose clothing and dangling straps catch on augers and blades. Secure them before you start. A clean site is a safe site, so stack rails away from the working line. Fencing with wood rewards preparation, not improvisation.
Step-by-Step Fence Construction
Marking the Layout
A fence is only as straight as the person pulling the string line. In South Africa, where the midday heat can distort your judgment, marking the layout demands method. Before you dig a single post hole for your fencing with wood, establish the boundary with careful measurement. I once watched a neighbor mark his line using a garden hose. His fence now curves noticeably.
Instead, set batter boards a short distance behind each corner. Run mason’s line between them. Then follow a simple order:
1. Place the first corner stake.
2. Stretch a line to the next corner.
3. Square the corner using a 3-4-5 triangle.
4. Verify both diagonals match.
Adjust the strings until the measurements agree within a few millimeters. Then spray paint the soil along the line. That becomes your working plan. Fencing with wood rewards precision and punishes guesswork.
Setting Corner Posts
After the layout lines are painted, set the corner posts first. In fencing with wood, these determine every placement. I dig square holes rather than round ones, because square holes allow adjustment with a shovel.
Set the post into the hole but leave it loose. Use a level to check vertical on two faces. Brace it with temporary stakes. Mix concrete only after the post stands plumb. Work in this order:
- Align the post face to the mason’s line.
- Check verticality with a spirit level.
- Shovel in concrete and slope it away.
Let the concrete cure for a full day! A rushed corner post causes problems later. Fencing with wood demands patience here, because the corner holds the most strain. If this post shifts, every panel beyond follows the error.
Installing Intermediate Posts
The interval between intermediate posts is where most fences lose their dignity. A taut mason’s line stretched between the corner posts is the only honest guide. I dig the holes first, but I keep the depth modest until the alignment is confirmed!
Once the holes are ready, the spacing becomes a matter of temperament. When fencing with wood, a standard span of two and a half metres suits most timber.
- Measure from the centre of the corner post, not the edge.
- Plumb the face against the line, allowing a slight tolerance for natural bowing.
- Backfill and tamp firmly, saving the concrete for the critical corners.
The intermediate post carries the rail, but it does not carry the full twisting strain. A little flex is acceptable, as long as the face is true. They take the daily strain without complaint, yet they demand your attention with every passing hour of daylight.
Attaching Rails and Pickets
The rail meets the post at the exact point where the fence earns its rigidity. I favour galvanised screws over nails, because a screw draws the rail into the post instead of merely pushing beside it. Set the spirit level along the rail’s top edge to catch the sag early. Pre-drill every fixing, as pressure-treated pine will split when coaxed too quickly.
Attaching the pickets follows a patient rhythm. I keep a spacer block clamped to the rail so the gaps remain constant across the entire run:
- Rest the picket against the spacer and hold the face true.
- Drive two screws per rail, one high and one low.
- Recheck the plumb line after every fifth picket.
In the highveld climate, the timber will move with the seasons. When fencing with wood, this movement is an interaction between the material and the weather. Leave a small breathing gap beneath each picket so soil moisture never wicks into the end grain. The result is a screen of vertical boards that catches the morning light and holds its line against the afternoon wind.
Adding Gates and Hardware
The gate is where most fence failures begin. I have replaced more sagging gates than broken posts, and the culprit is almost always poor hardware. When fencing with wood, the gate frame needs hinges rated for its real weight. A 1.8 metre pine gate can weigh over forty kilograms on the highveld!
- Use three hinges for gates over 1.5 metres
- Match galvanised hinges to galvanised screws
- Fit a drop rod on double gates to protect the latch post
Check the mechanics before you hang anything. In fencing with wood, the latch post carries the heaviest duty in the run. If you set it in concrete but skip the diagonal brace, the gate will droop within a season. I fit a turnbuckle brace from the bottom hinge corner to the top latch corner and tension it after the first rains. The timber moves, the brace takes up the slack, and the latch seats cleanly!
Finishing Touches
With the gate hung and the latch seated, the final pass over the fence determines how it will age. I walk each section with a block plane in hand, shaving the top of every post to a gentle crown so rainwater sheds instead of pooling. That small bevel, maybe ten millimetres, prevents the end grain from drinking moisture and splitting before the Highveld summer rains!
Finishing touches in fencing with wood go beyond appearance. I check every screw head, countersinking any that stand proud, then fill the holes with a waterproof sealant. The list feels small but carries weight:
- Trim protruding rail ends flush
- Sand rough edges that catch clothing
- Apply a timber preservative to all cut faces
- Leave a gap between the bottom rail and the soil
Each detail takes minutes and protects the timber where it matters most.
Maintaining Your Wooden Fence
Cleaning and Washing
The South African sun is a relentless beast. Its ultraviolet rays, combined with the abrasive grit of the Highveld wind, work on timber without mercy. For a property owner, the consequence is a slow, silent degradation that begins not at the core of the post, but on the very surface of the planks. Cleanliness here is not a virtue; it is a fundamental requirement.
A simple wash with a garden hose and a soft brush removes the loose grime that gathers in the joints. However, this superficial act only postpones the inevitable. Over time, a grey, brittle film develops on the wood. This is not merely a cosmetic blemish. This layer of oxidised cellulose holds moisture against the grain, inviting the microscopic organisms that cause rot. To truly maintain the integrity of your structure, you must disrupt this process with intention.
Deep cleaning requires a more deliberate approach, often involving a dedicated wood cleaner that lifts embedded dirt without damaging the fibres. You should always test a solution on a small, hidden area first. When you see the water bead and run off rather than soak in, you know the surface is sealed and protected. The ritual becomes a dialogue with the material, a way of reading the subtle changes in colour and texture that signal a need for attention.
For most homes, the annual effort is enough, but the conditions dictate the frequency. Consider the environment around your perimeter to determine the necessary schedule.
– Remove any climbing plants or vines that hold dampness against the boards.
– Check the base of the posts where they meet the soil for signs of splash-back erosion.
– Clear away leaf litter that accumulates in the corners and along the bottom rail.
– Inspect for speckles of black mold that thrive in the shaded sections of the boundary.
The water you use is as important as the technique. A strong jet from a pressure washer can gouge grooves into the timber, creating a rough surface that accelerates future wear. A gentler flow, applied patiently, lifts the years of weather away without injury. When the cleaning is complete, the wood should look dry and thirsty, ready to accept a protective oil or stain. This state of readiness is the true goal; it ensures the subsequent treatments bond to the grain and last through the seasons. Proper care here extends the life of your initial investment in fencing with wood, preserving both its strength and its voice in the landscape. This quiet maintenance ensures the barrier votes for you against the elements, year after year.
Staining and Sealing
The moment your cleansed timber turns pale and thirsty, the clock starts. Staining and sealing are non-negotiable. They protect against the Highveld’s punishing cycles. A penetrating sealer sinks into the grain, while a film-forming stain sits on the surface. The choice alters the future of your fencing with wood.
I prefer a semi-transparent stain for its flexibility. It allows the natural texture to show while blocking ultraviolet rays. Before you begin, ensure the moisture content is below 15 percent. A simple meter saves you from peeling finishes. For a robust fencing with wood, this step matters.
- Work in the morning shade to avoid rapid drying.
- Apply two thin coats rather than one heavy layer.
- Brush along the grain, never against it.
Reapply every two to three years. The fence endures rain, dust, and the unrelenting sun. Your care gives it a fighting chance.
Preventing Rot and Pests
The true fight for longevity happens at the base, where soil, moisture, and timber converge into a living ecosystem. Pests are opportunists, and moisture is their enabler. I make a habit of walking the fence line after heavy rains, looking for a smear of mud, a speckle of frass, or a post that sounds dull when tapped.
A quick sensory check works wonders:
- Probe the base with a screwdriver to find soft, spongy spots.
- Clear grass and weeds that touch the pickets.
- Maintain a gap between the soil and the bottom rail to allow airflow.
By managing the conditions around the timber, we stop it from becoming food. Keep the ground breathable and the base dry, and the structure stands for decades! This vigil is what truly preserves your fencing with wood.
Seasonal Inspections
Each season treats a wooden boundary differently. Those who maintain fencing with wood know the Highveld’s dry winter leaves timber brittle, while the Cape’s rain-soaked months test every joint. I walk the property at each seasonal turn, reading how the structure responded to the weather it endured.
The work is quiet and tactile. I run a thumb along the picket edges for splintering. I watch the gaps between boards on hot afternoons for bowing. I test fasteners with a socket wrench. Gravel boards shift, posts rotate, and bottom rails settle into the soil by millimetres.
- I note pickets that have risen above their neighbours.
- I check the gate alignment against its latch.
- I examine the top rail for cracks running with the grain.
- I feel for looseness where the post meets the rail.
These observations reveal what the fence needs before a repair becomes a replacement. Fencing with wood demands this seasonal attention!
Repairing Common Damage
Timber does not fail suddenly. It fails gradually through neglected signals mistaken for cosmetic quirks. A fence leaning three degrees, a gate dragging across the ground, pickets that move when pushed. These are structural warnings!
Repairing common damage begins with understanding load. The post transfers weight to the ground. The rail distributes pressure across the span. The picket protects the frame from weather. When one element weakens, the others compensate until they cannot.
- Rot at the post base
- Cracks along the rail where fasteners bite
- Loose joints between rail and post
- Split pickets that admit water into the core
Fencing with wood rewards those who intervene early. I have watched the cost of delay. Cutting away damaged sections, sistering new timber alongside compromised posts, and resetting fasteners extends the life of the structure. Fencing with wood becomes a dialogue between owner and material, where attentive repair prevents wholesale replacement.